Technologies Being
Used
JavaScript
React
Node
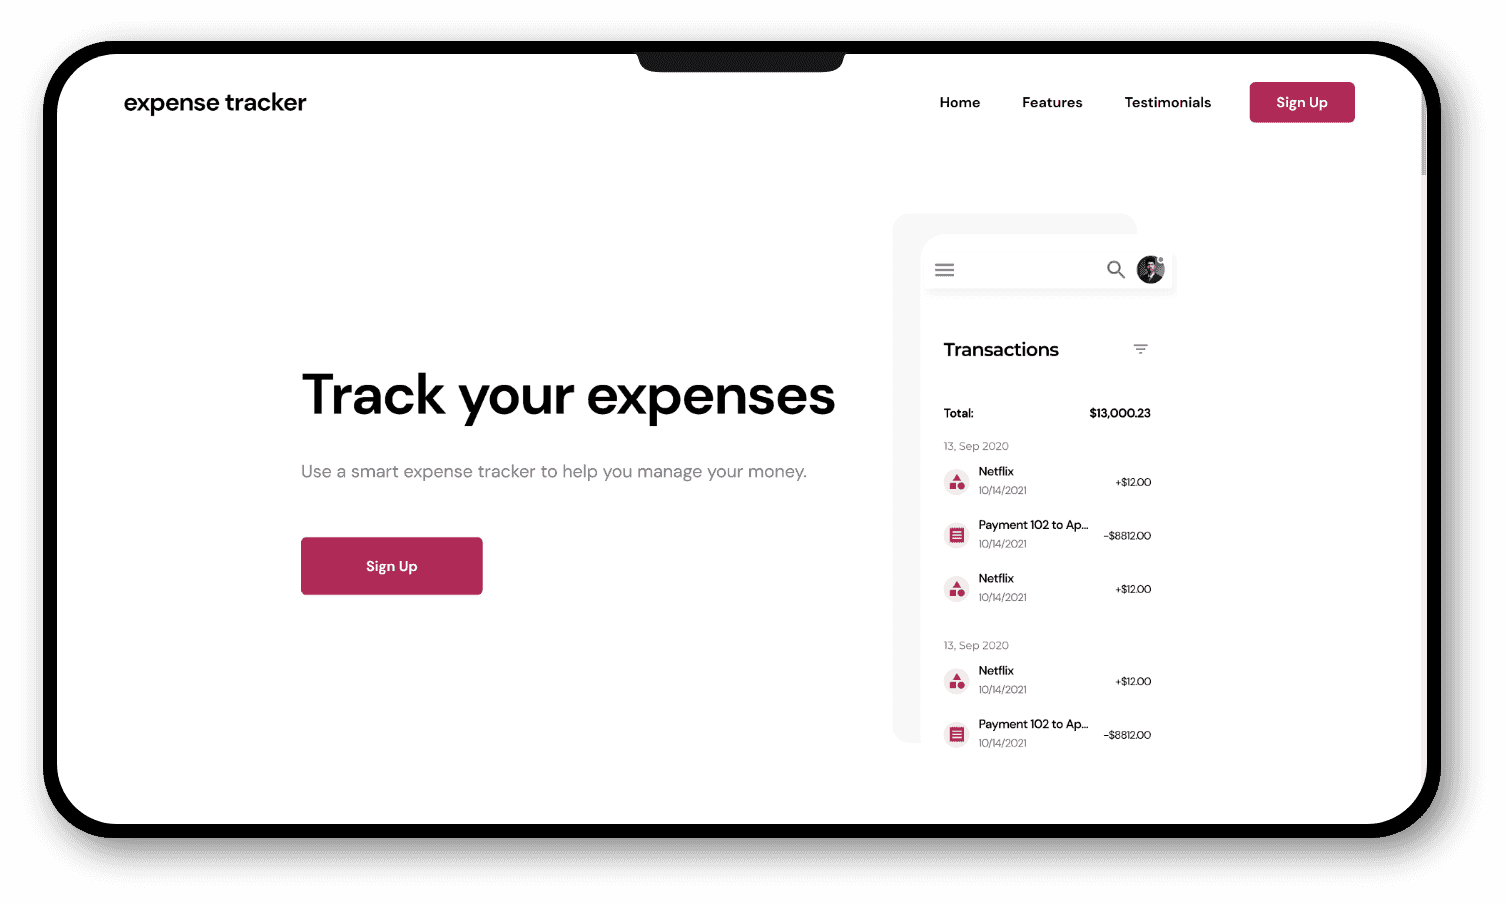
One of my best projects yet, this app is filled with powerful features. After identifying that I needed a way to manage my subscriptions, I decided to build an expense tracker. After researching, I developed a list of problems that my app needed to solve. First, people need a way to quickly record their daily transactions. When using an expense tracker, people want to add a transaction and move on; it is not something that they want to spend a lot of time on. Second, people must be able to track subscriptions and regular bills. Today, people might have dozens of subscriptions, so I realized that they need an efficient way of organizing them. Finally, many people create budgets to responsibly manage their finances. Therefore, they need to understand how much money they have spent on a budget. This app is the solution to these problems.
After about two months, I created an expense tracker as a web app. I created both the front-end and the back-end for the application using various technologies. I used Node and Express for the server, MongoDB for the database, and OAuth with an option for signing in with Google to handle authentication. Furthermore, I created the following pages: a transactions, bills, budgets, and statistics page. In the front-end of the application, I took a different approach from usual. Instead of using Bootstrap like my other projects, I chose to use only CSS. More importantly, I focused on making the design fully responsive. By taking a mobile-first approach, I made certain that mobile users would have an impeccable experience. However, I also enhanced the view for larger screens. By adding sidebars for larger screens and making the text responsive, I took advantage of the extra space larger screens offer. Because of this, users of all screen sizes can benefit from the features of the app. The next paragraph will describe these features.
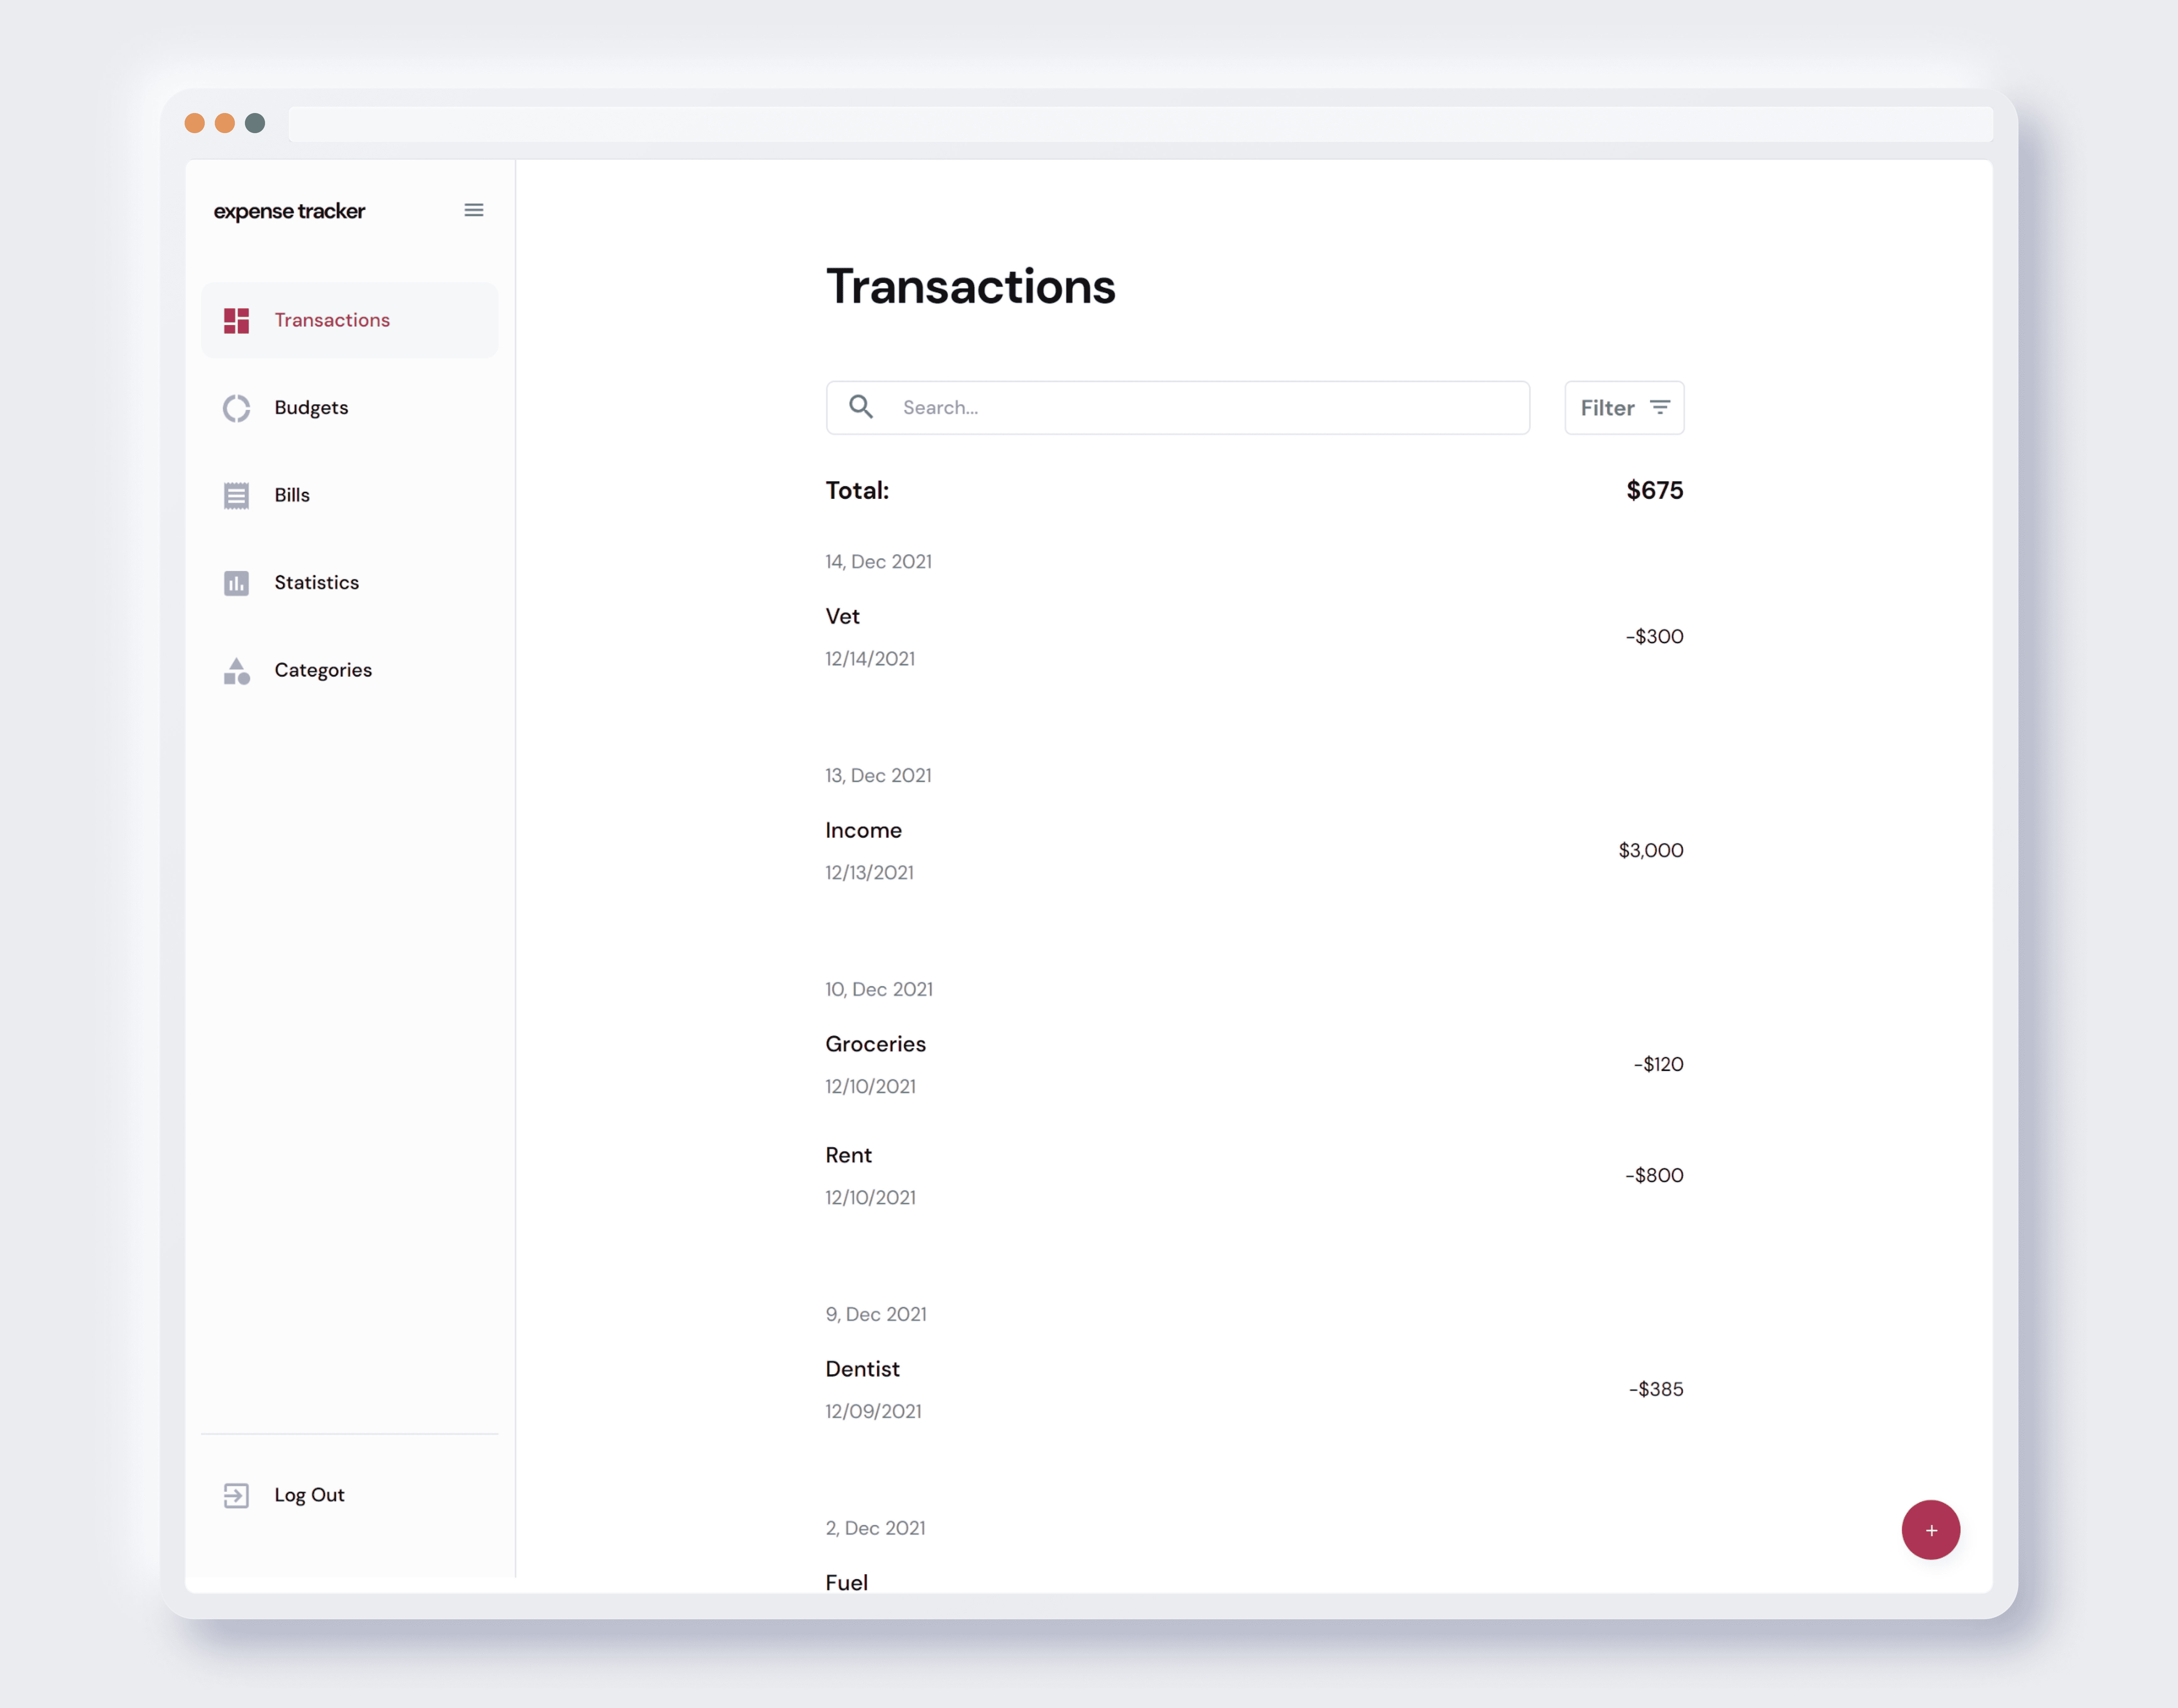
The first page I created was the transactions page. Upon visiting the page, people are met with a friendly, clean list of transactions. People can see the amount for each transaction and the total at the bottom, and they can quickly add a transaction using the quick add button. When adding a transaction, people can set the transaction's name and amount, and choose whether it is an expense or an income. From my research, I knew that sometimes people needed to search for transactions by a specific date. For this reason, I added a calendar so that people could choose the exact date they are seeing transactions for. Furthermore, they can search for a transaction by name and filter the transactions list by the transaction type. However, I knew that some transactions, such as bills or paychecks, can happen regularly. I knew that adding them manually would be tedious and unnecessary, so I decided to automate it.
One of the pages I dedicated the most time to is the bills page. By setting a schedule for each bill while they are creating it, people can have transactions added automatically on the days they choose. For instance, they can add a bill from a music streaming service and set it up so that it is subtracted from their balance on the first of every month. This way, people are relieved from worrying about adding some transactions manually. I also knew that people might benefit from knowing when a bill would be due, so I added a next due date to each bill. Furthermore, some people may want to see what bills are scheduled for a particular date in the future. For instance, a person may want to predict their balance two months from now. By selecting a date in the future using the calendar, people can view their estimated balance, with their bills taken into account. I decided to apply the same features to budgets.
Similarly, people can add schedules to budgets and have transactions added automatically. This will be useful to anyone that is paid regularly, too, since they can create a budget to add their income to the transactions list on their payday automatically. Also, people benefit from powerful budgeting tools. For instance, they can set a maximum amount that they want to spend for each budget. Then when making a transaction, they can assign it to a budget. Using a progress bar, they can see how much they have spent. With all of these tools, people can manage their finances more efficiently. However, one of the most important aspects of financing is evaluating your spending habits. This is why I created the next page: a complete statistics page.
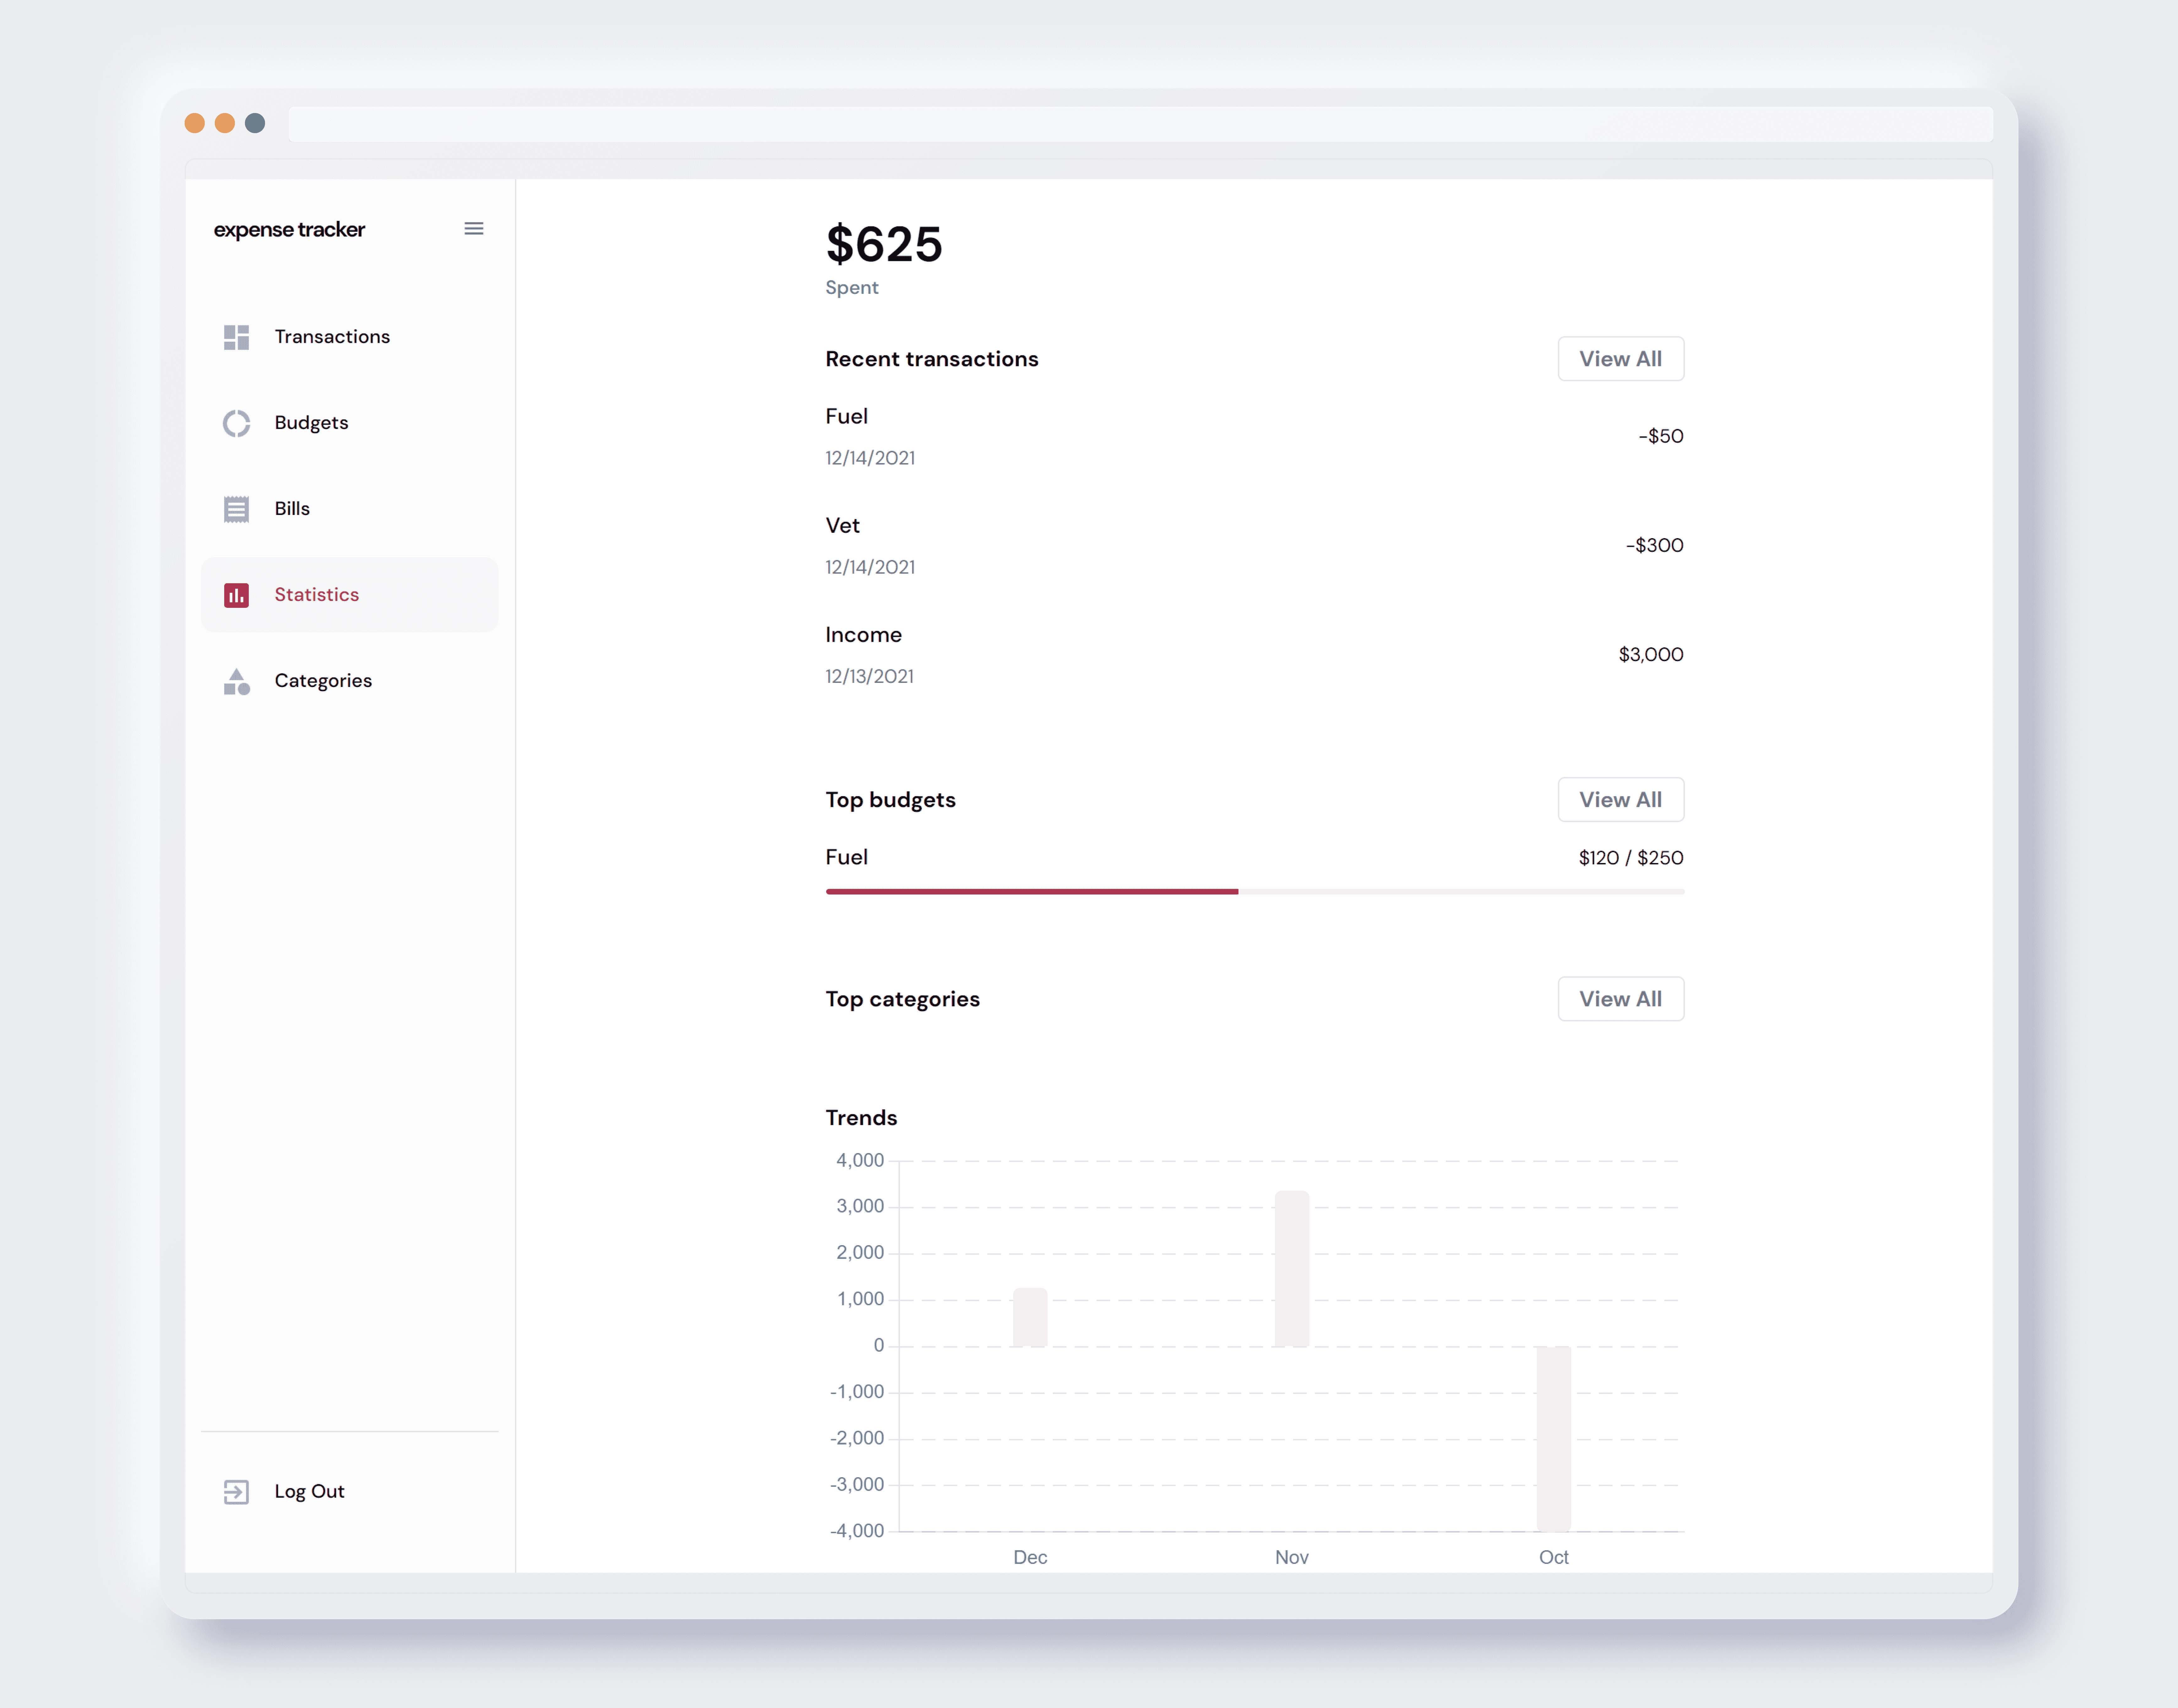
People can analyze their spending habits using the statistics page. When a person goes to the page, they are met with a friendly graph that shows them their spending habits over the month. Additionally, they can see their total incomes and expenses for the selected month. They can see their top transactions so that they know what they spent the most on. Because people may want to see how their spending habits have changed, I also added a month switcher so that they can quickly change the month they are seeing statistics for. This way, this app can help people understand whether they are spending their money wisely.
After careful research and planning, I created an expense tracker with the following pages: a statistics, budgets, bills, and transactions page. I successfully created a back-end and front-end, created an authentication system, and built an API to help people organize their transactions, budgets, and bills. I used graphs to help people visualize their transactions. Although this was the largest project I have ever taken on, I had fun working on it and am proud to have completed it. Do you want to try it out? It’s live! Click on the "Visit Website" link at the top to see it.
Screenshots
Like what you saw?
Lets have a quick discussion on your project and we can get started.

